Hosted Payment Page
The Hosted Payment Page is a secure portal that allows you to accept payments from your consumers without having to build and manage your own payment gateway.
For Checkout Hosted Payment Page integration via Commerce Center, there are two options for configuring how to handle transaction completion:
- Use the provided order confirmation success and error pages.
- Redirect to merchant-provided success and error pages.
How it works
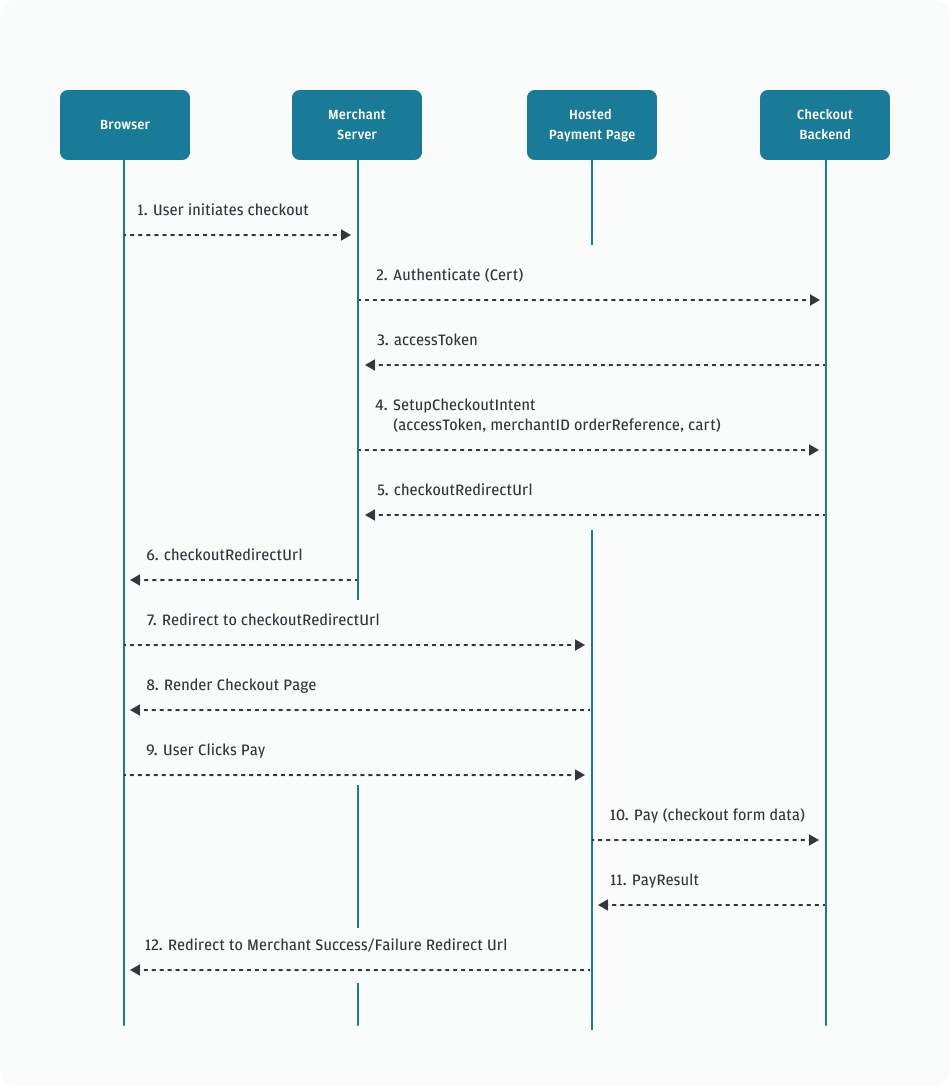
Here's a diagram that illustrates the Hosted Payment Page redirect process flow to help you better understand the flow of information between the components.

- The browser initiates a checkout with the merchant server.
- The merchant server sends an authentication request via the checkout backend.
- If authentication is successful, an
accessTokenis sent in response to the merchant server. - The merchant server creates a checkout session by sending a
POSTrequest to the/checkout/intentendpoint, using the accessToken received from the checkout backend, the merchant ID, an order reference, and a cart object. - The checkout backend sends
checkoutRedirectUrlas a response to the merchant server. - The merchant server sends checkoutRedirectUrl to the browser.
- The merchant webpage redirects the consumer to checkoutRedirectUrl.
- The Hosted Payment Page renders the Hosted Payment checkout form on the browser.
- The consumer clicks Place Order / Pay on the pay form.
- The Hosted Payment Page initiates Pay (checkout form data) with the Hosted Payment checkout backend.
- The Hosted Payment checkout backend sends the
payResultto the Checkout Hosted Page. - The Hosted Payment Page redirects the consumer back to the merchant's configured success or failure redirect URL.
Configure using Commerce Center
You can use the Checkout Settings page in the Commerce Center portal to configure the Checkout experience.
Perform the following steps to configure Checkout settings:
- Log in to the Commerce Center.
- Go to Settings.
- Click on Checkout from the drop-down list.
- Select the configuration settings as per your business needs. The available options are:
- Order confirmation page
- Merchant-defined success and failure pages
- Once you are done, click Publish.
Order confirmation page
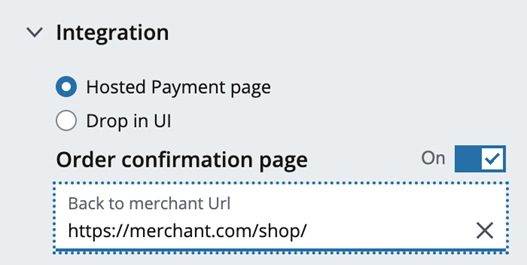
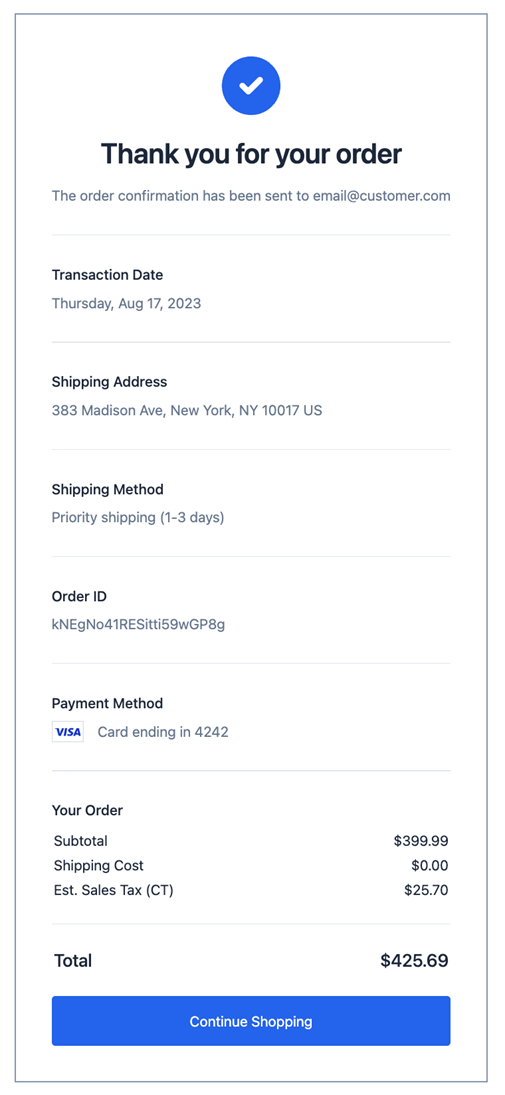
If you choose to use the Order confirmation page, the consumer is sent to the success or failure page on the Checkout application when Continue Shopping is clicked.
Perform the following steps to enable this feature:
- Set the Order confirmation page toggle to On.
- Enter the URL of the page in Back to merchant Url. This URL will only support a domain and a path. Query parameters are not supported.

Sample success page:

Merchant-defined success and failure pages
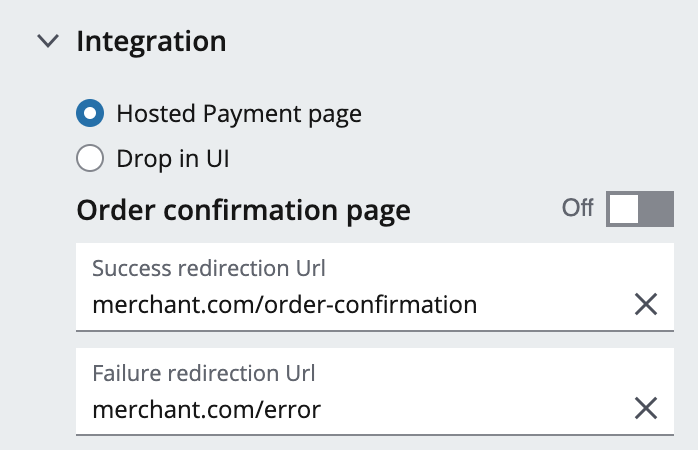
You can also redirect your consumers to a success or failure page of your choosing.
Perform the following steps to enable this feature:
- Set the Order confirmation page toggle to Off.
- Enter both URLs in Success redirection Url and Failure redirection Url. These URLs will only support a domain and a path. Query parameters are not supported.

When a consumer is sent to the success or failure page, more query parameters are added with the key reference, which will have the value of the order ID you provided when creating the checkout session token via the /checkout/intent endpoint.
If a payment is in pending status, a consumer will be sent to the success page with and additional parameter of pending=true.